Features
AI Chat Connectors
Features
AI Chat Connectors
Chat Connectors let you connect AI chat apps, like ChatGPT, Claude, Cursor, or Le Chat, to your Capacities space.
Overview
Chat Connectors use the Model Context Protocol (MCP) open standard to connect a Capacities space to an external AI assistant.
What your assistant can do
- Search your space by keywords and topics
- List objects by tag, collection, or object type
- Read full objects, including properties and body content
- Create pages, tasks, and objects of any type with the properties you specify
- Upload images, PDFs, and other files into your space
- Update properties on existing objects (status, tags, dates, title, and custom properties)
- Append content to existing notes
- Edit blocks inside an object (add, update, or delete blocks)
- Save text to your daily note
- Link to objects in its replies
If an external assistant changes a note in a way you do not want, use Version history on that object to preview and restore an earlier version.
For OAuth, client registration, and other technical details, see our Model Context Protocol guide.
Using AI Chat connectors does not consume your Capacities AI Budget. The Capacities AI Budget is only consumed by the features that use AI inside Capacities. When using an AI Chat connector, you're already paying for the AI usage via your preferred AI service.
Example prompts
- "Find my notes on the French Revolution in Capacities and create a bullet list of the most relevant historical figures."
- "Store your last response in my Capacities daily note and add the tags #architecture and #inspiration at the end."
- "Provide links to all my objects in Capacities that refer to this conversation topic, and organize them by object type."
- "Review my Capacities objects about Botticelli and compare recurring themes across his paintings in a concise Markdown table."
- "Gather everything I wrote in Capacities about the recent renovations at La Sagrada Familia and relate them to online sources and news articles."
- "Create a Capacities task to follow up with the design team, due next Tuesday, with high priority."
- "Add a new Person object in Capacities for the speaker from today's podcast, using their name and role in the properties and my notes in the body."
- "Set the status on my Capacities Book object for 'Deep Work' to finished."
- "List my Capacities pages tagged #projects."
- "Upload this image into my Capacities space."
Setup guide
In the setup process you'll give the tool of your choice access to a selected Capacities space. The AI can then interact with Capacities on your behalf.
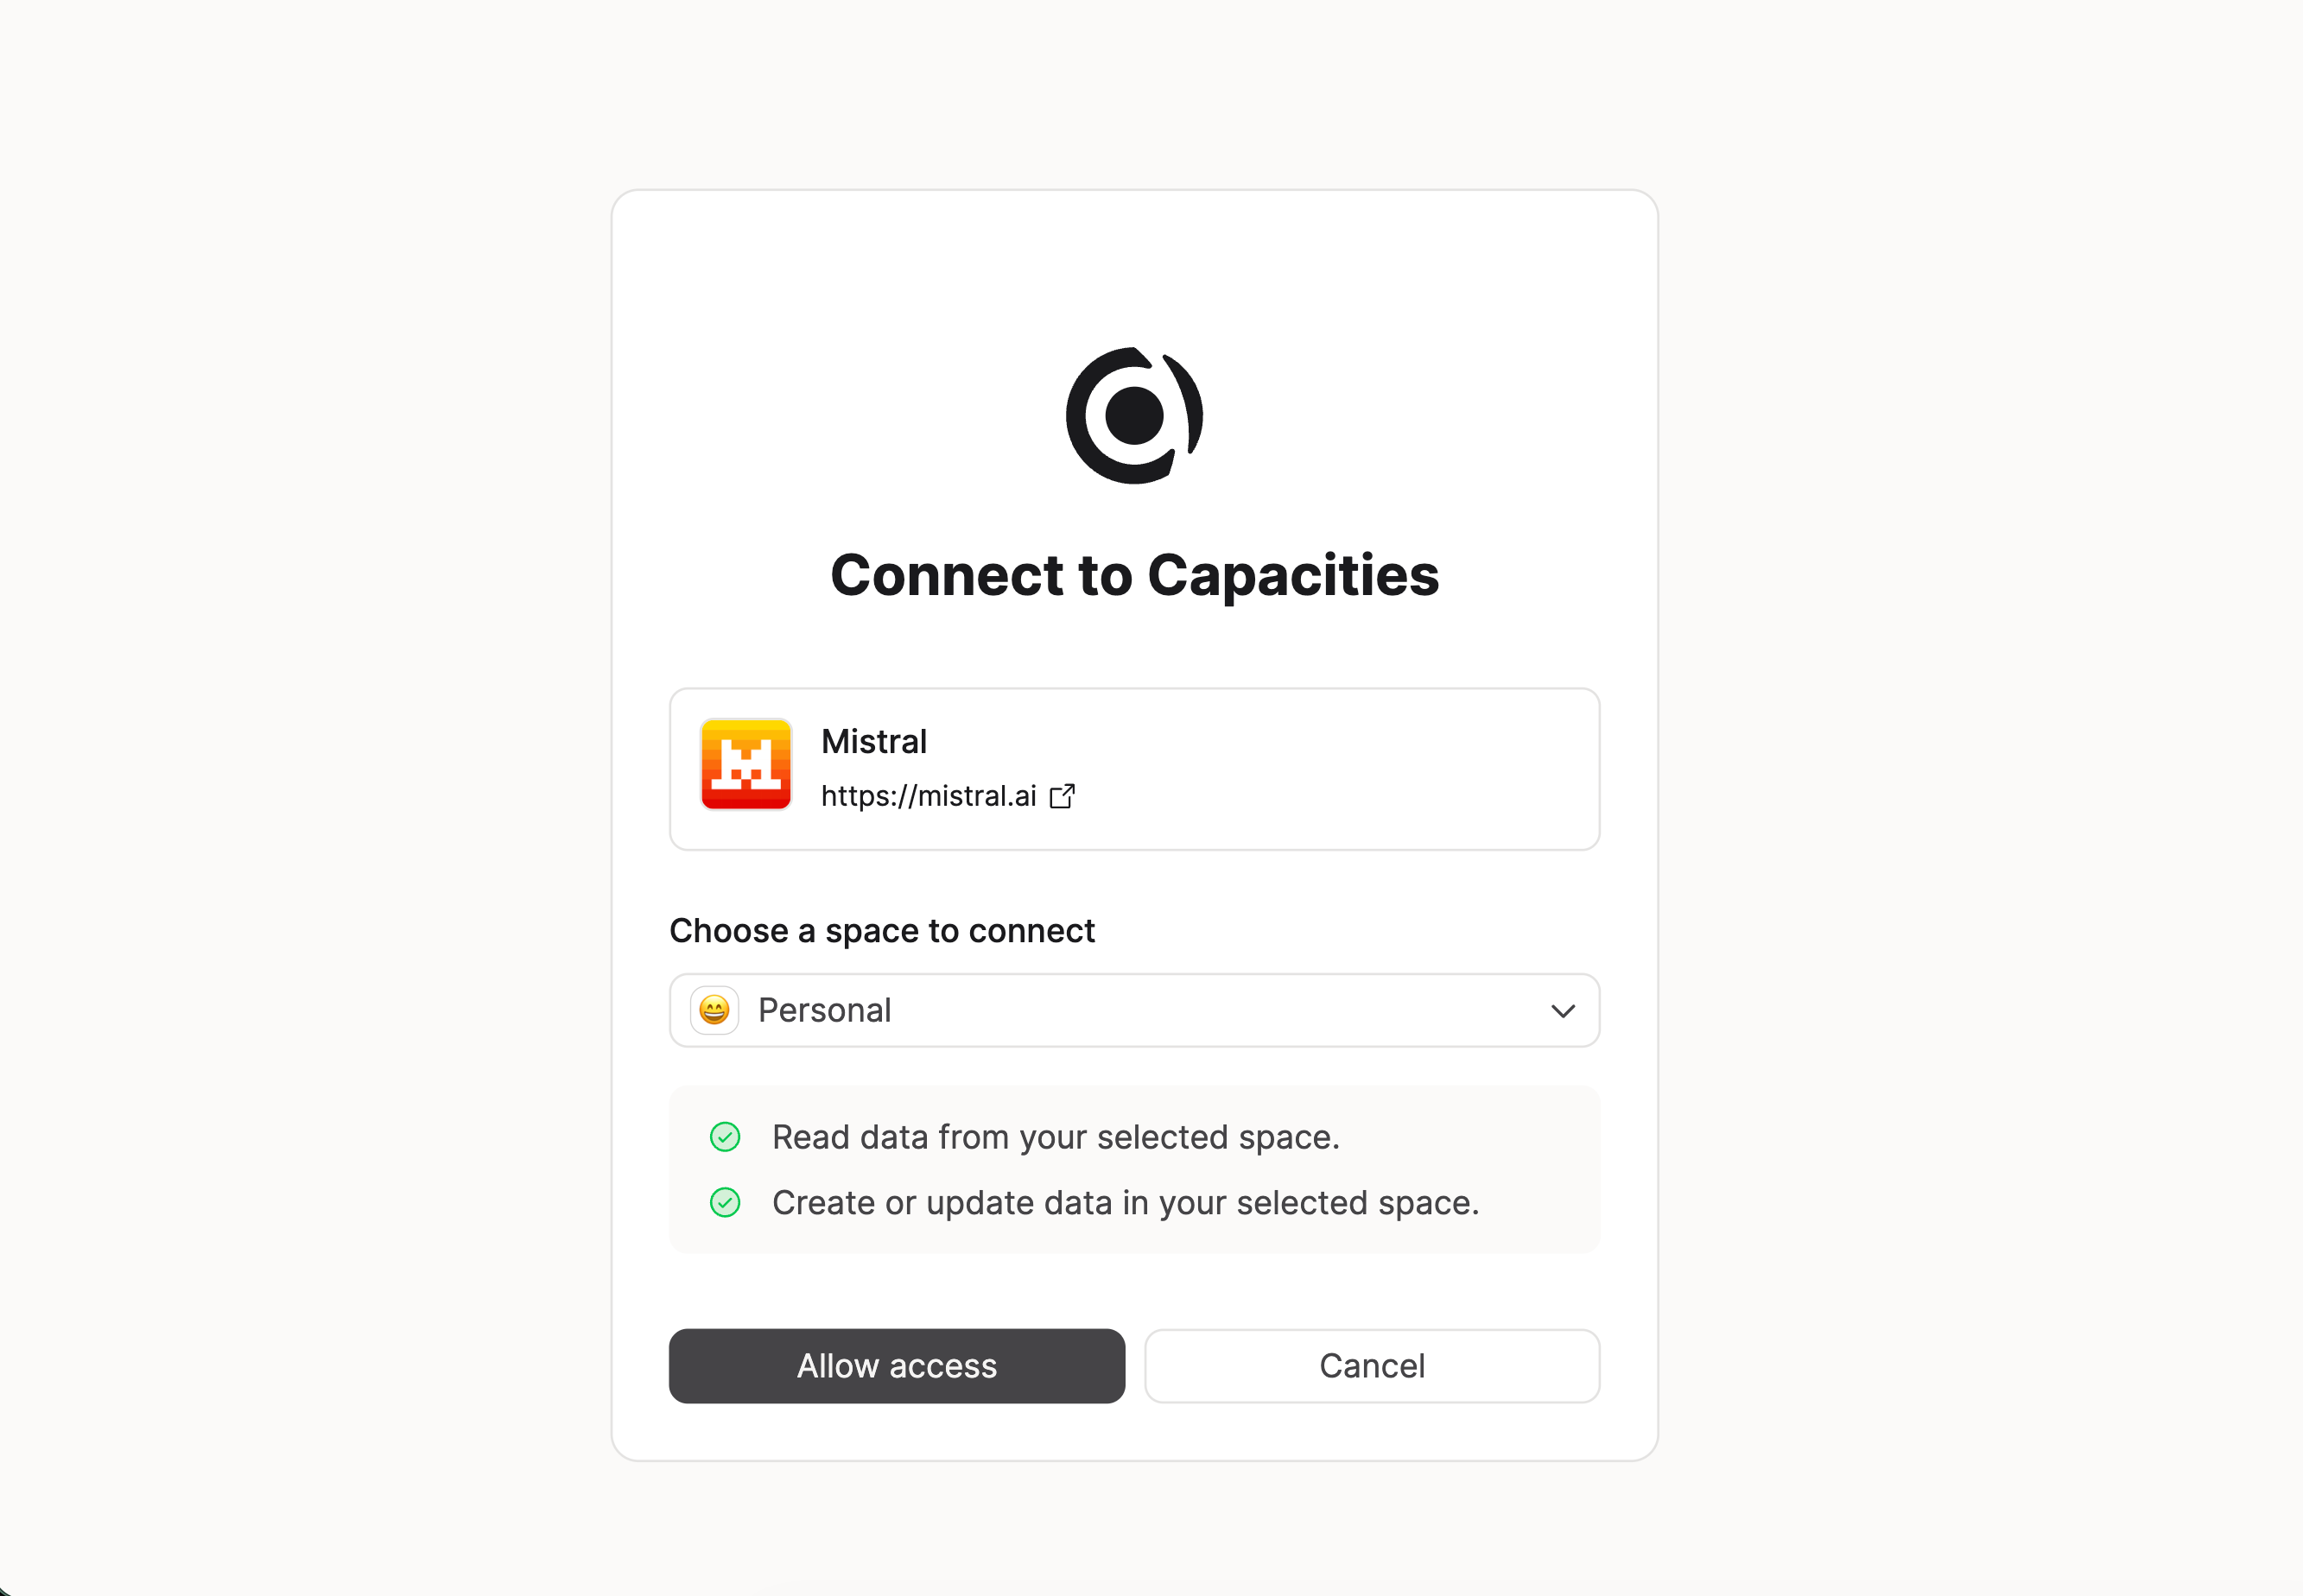
Only the space that you select in this consent screen is the one that the tool will be able to access for that particular connection. If you would like to use multiple spaces from the same AI tool, you'll have to setup multiple MCP connections.
If you don't see a space in the consent screen, AI Assistant is not enabled for that space yet. Only spaces with AI Assistant enabled are shown and can be connected through MCP.
In the following are instructions for setting up the most popular AI tools.
ChatGPT
- Access our published ChatGPT connector in the App Directory.
- Click
Connect, and go through the authentication flow to connect to your space.
Claude
- Access our published Claude connector in Claude's connector directory.
- Click
Connect, and go through the authentication flow to connect to your space.
If you're setting up a third party (3P) inference provider with Claude, please provide the following configuration:
- client ID: claude_desktop_mcp_capacities_public
- scopes: [mcp:read, mcp:write, offline_access]
- request offline access: No
- callback host: 127.0.0.1
- callback port: 54545
Claude Code
- Run this command in your terminal:
claude mcp add --transport http capacities https://api.capacities.io/mcp - Authenticate by running
/mcpin Claude Code and following the authentication flow. - Use the
/mcpcommand to list and manage the MCP servers you have installed, and use the/contextcommand to understand the context token usage of your current session, including the number of tokens used by each MCP server that’s enabled.
ClickUp
- Open App Center in ClickUp (click your Workspace avatar → Apps).
- In the sidebar, select MCP Servers.
- Click Add Custom MCP Server.
- Enter the server URL:
https://api.capacities.io/mcp
- In the Advanced configuration section, enter the following client ID:
- Client ID:
clickup_mcp_capacities_public
- Client ID:
- Complete the authentication flow to connect your space.
Google Gemini
Custom MCP servers are only supported in the Gemini CLI, Gemini Enterprise / Workspace, and Gemini Spark. The consumer web and mobile app (gemini.google.com) does not support custom MCP servers.
Gemini CLI / Developer Setup
- Create or edit your configuration file at
~/.gemini/settings.json(macOS/Linux). - Add the Capacities MCP server block:
{
  "mcpServers": {
    "capacities": {
      "url": "https://api.capacities.io/mcp",
      "transportType": "streamable-http"
    }
  }
}
- Restart your terminal interface and run
/mcpto verify the connection.
Gemini Enterprise & Workspace
- Navigate to your Admin or Workspace Console → Data Connectors.
- Select Connected data stores → + New Data Store.
- Choose Custom MCP Server under third-party sources.
- Enter the MCP Server URL:
https://api.capacities.io/mcp - Provide authorization endpoints and OAuth credentials as requested, then complete verification.
Gemini Spark
- In Gemini Spark, go to Settings → Custom connected apps.
- Click + Add custom connected app.
- Name your connection (e.g., Capacities) and enter the URL:
https://api.capacities.io/mcp
- Use the following OAuth credentials when configuring your connection:
- Client ID:
gemini_spark_mcp_capacities_public
- Client ID:
- Complete the authentication flow to connect to your space.
Le Chat (Mistral)
- Open
Intelligence → Connectors - Click
+ Add Connector, thenCustom MCP Connector. - Specify a name (ex.
Capacities), and a description that helps the model understand what Capacities is. For example:
Capacities brings together connected note-taking and structured data so everything you care about becomes an object, whether it’s a person, a book you’re reading, a project you’re working on or an idea you want to explore. Objects have structure, properties and connections that grow into a living network of your thoughts.
- Enter the URL:
https://api.capacities.io/mcp
Then click on Connect
- Complete the authentication flow to connect to your space.
Perplexity
- Go to the Connector settings within Perplexity (link)
- Click on
+ Custom connector. Note that this option is only available for paid memberships to Perplexity. Read more here. - Specify a name (ex.
Capacities), and a description that helps the model understand what Capacities is. For example:
Capacities brings together connected note-taking and structured data so everything you care about becomes an object, whether it’s a person, a book you’re reading, a project you’re working on or an idea you want to explore. Objects have structure, properties and connections that grow into a living network of your thoughts.
- Enter the URL:
https://api.capacities.io/mcp
- Click "Advanced" and enter this Client ID:
perplexity_mcp_capacities_public
- Click
Add, and complete the authentication flow to connect to your space.
Raycast
- Open Raycast and search for the Install MCP Server command.
- Set the transport type to HTTP and enter the URL:
https://api.capacities.io/mcp
- Under HTTP Headers, add the following header:
- Key:
client_id - Value:
raycast_mcp_capacities_public
- Key:
- Click Install MCP Server and complete the authentication flow to connect your space.
LM Studio
- Navigate to the
Developertab, then click onmcp.json. - Paste the following configuration:
{
  "mcpServers": {
    "capacities": {
      "url": "https://api.capacities.io/mcp",
      "auth": {
        "CLIENT_ID": "lm_studio_mcp_capacities_public"
      }
    }
  }
}
- Click on
Save. - Next, in the
Chatstab, activate themcp/capacitiesentry and click onAuthenticate, then complete the authentication flow to connect to your space.
Cursor
- Open Cursor
Settings → MCP → Add new global MCP server - Paste the following configuration:
{ "mcpServers": { "capacities": { "url": "https://api.capacities.io/mcp", "auth": { "CLIENT_ID": "cursor_mcp_capacities_public" } } } } - Save and restart Cursor.
- When you first use Capacities from Cursor, complete the authentication flow to connect your space.
Visual Studio Code
- Run the
MCP: Add Server...command. - Select
HTTPas the type of MCP server. - Enter
https://api.capacities.io/mcpas the server URL. - The server ID should be an identifiable name (ex. Capacities).
- Choose if it should be configured globally for VS Code or just the active workspace.
- You'll get a pop-up, click
Proceedand then usevscode_mcp_capacities_publicas the client ID. Leave the secret blank. - Another pop-up will take you to the authentication flow to connect your space.
OpenCode
- Open your configuration file (
opencode.json, can be found in~/.config/opencode). - Add the following mcp entry:
{
  "$schema": "https://opencode.ai/config.json",
  "mcp": {
    "capacities": {
      "type": "remote",
      "url": "https://api.capacities.io/mcp"
    }
  }
}
- Authenticate by running
opencode mcp auth capacities
OpenAI Codex
- Go to Settings > MCP servers.
- Click on
+ Add server. - Specify a name (ex.
Capacities), and selectStreamable HTTP. Then click onSave. - Click on
Authenticate, and complete the authentication flow to connect to your space.
Google Antigravity
- Open Cursor
Settings → Customizations → Installed MCP Servers - Open the MCP Config, then paste the following configuration:
{
  "mcpServers": {
    "oauth-server": {
      "serverUrl": "https://api.capacities.io/mcp"
    }
  }
}
- Save and refresh the MCP Servers settings. Then click on
Authenticateand complete the authentication flow to connect your space. At the end, you'll receive a code. - Paste the code in the MCP Servers settings and click
Submit.
Android Studio
- Open Android Studio. Then go to
Settings → Tools → AI → MCP Servers. - Check
Enable MCP Servers, then add the following to your configuration:
{
  "mcpServers": {
    "capacities": {
      "httpUrl": "https://api.capacities.io/mcp"
    }
  }
}
- After clicking
OK, you will see a notification saying "Error connecting to transport: Authorization Exception" with a button that saysStart Login. - Complete the authentication flow to connect your space.
Langdock
These steps add Capacities as an external MCP tool that your Langdock agents can use.
- Open
Integrationsfrom your workspace sidebar. - Click
Add Integration, selectCreate New, then chooseMCP Server. - Enter
https://api.capacities.io/mcpas the server URL. - Select OAuth as the authentication method, then click
Create and connect. - Complete the authentication flow to connect your space. The Capacities tools then appear in your Integration Directory, where you can add them to agent workflows.
Littlebird AI
- Open
Settings → Integrations. - Add a new MCP connection and enter
https://api.capacities.io/mcpas the server URL. - Complete the authentication flow to connect your space.
Manus AI
- Open
Settings → Integrations → Custom MCP Servers → Add Server - Enter the server URL:
https://api.capacities.io/mcp - Complete the authentication flow to connect your space.
Grok
- Go to the connectors page.
- Click
New Connector, then selectCustom. - Enter the server URL:
https://api.capacities.io/mcp - Complete the authentication flow to connect your space.
Hermes Agent (Nous Research)
- Open Hermes Agent.
- Open
Settings→MCP Servers. - Click
Add MCP Server. - Enter the server URL:
https://api.capacities.io/mcp - Complete the authentication flow to connect your space.
Dust
- Open your Dust workspace and go to
Spaces → Tools. - Click
Add Tool, then selectAdd MCP Server. - Enter the server URL:
https://api.capacities.io/mcp - The Automatic option will discover the OAuth configuration. Complete the authentication flow to connect your space.
Sentience
- Open Sentience and go to your assistant's MCP connection settings (Settings → MCP Servers).
- Click
Add MCP Serverand enter the server URL:
https://api.capacities.io/mcp
- Complete the authentication flow to connect your space.
Town
- Open
Integrationsin your Town workspace (town.com/integrations). - Click to add a custom tool or MCP server from a URL.
- Enter the server URL:
https://api.capacities.io/mcp
- Complete the authentication flow to connect your space.
Notion Custom Agents
MCP connections for Custom Agents are available on Notion Business and Enterprise plans only.
- Open your Custom Agent's
Settings. - Go to
Tools & Access. - Click
Add connection→Custom MCP server. - Enter the MCP server URL:
https://api.capacities.io/mcp
- Provide a display name (e.g., Capacities).
- Select OAuth as the authentication method.
- Open Advanced settings and enter the following Client ID:
notion_mcp_capacities_public
- Leave the Client Secret field empty.
- Complete the authentication flow to connect your space.
Other AI tools
You can always configure the Capacities MCP server as a custom MCP client with any tool that supports the MCP protocol, please checkout our Model Context Protocol guide.
Request a new AI chat connector
Missing any other apps we should have an official AI Chat Connector for? Please let us know via our feedback board.
Managing Access
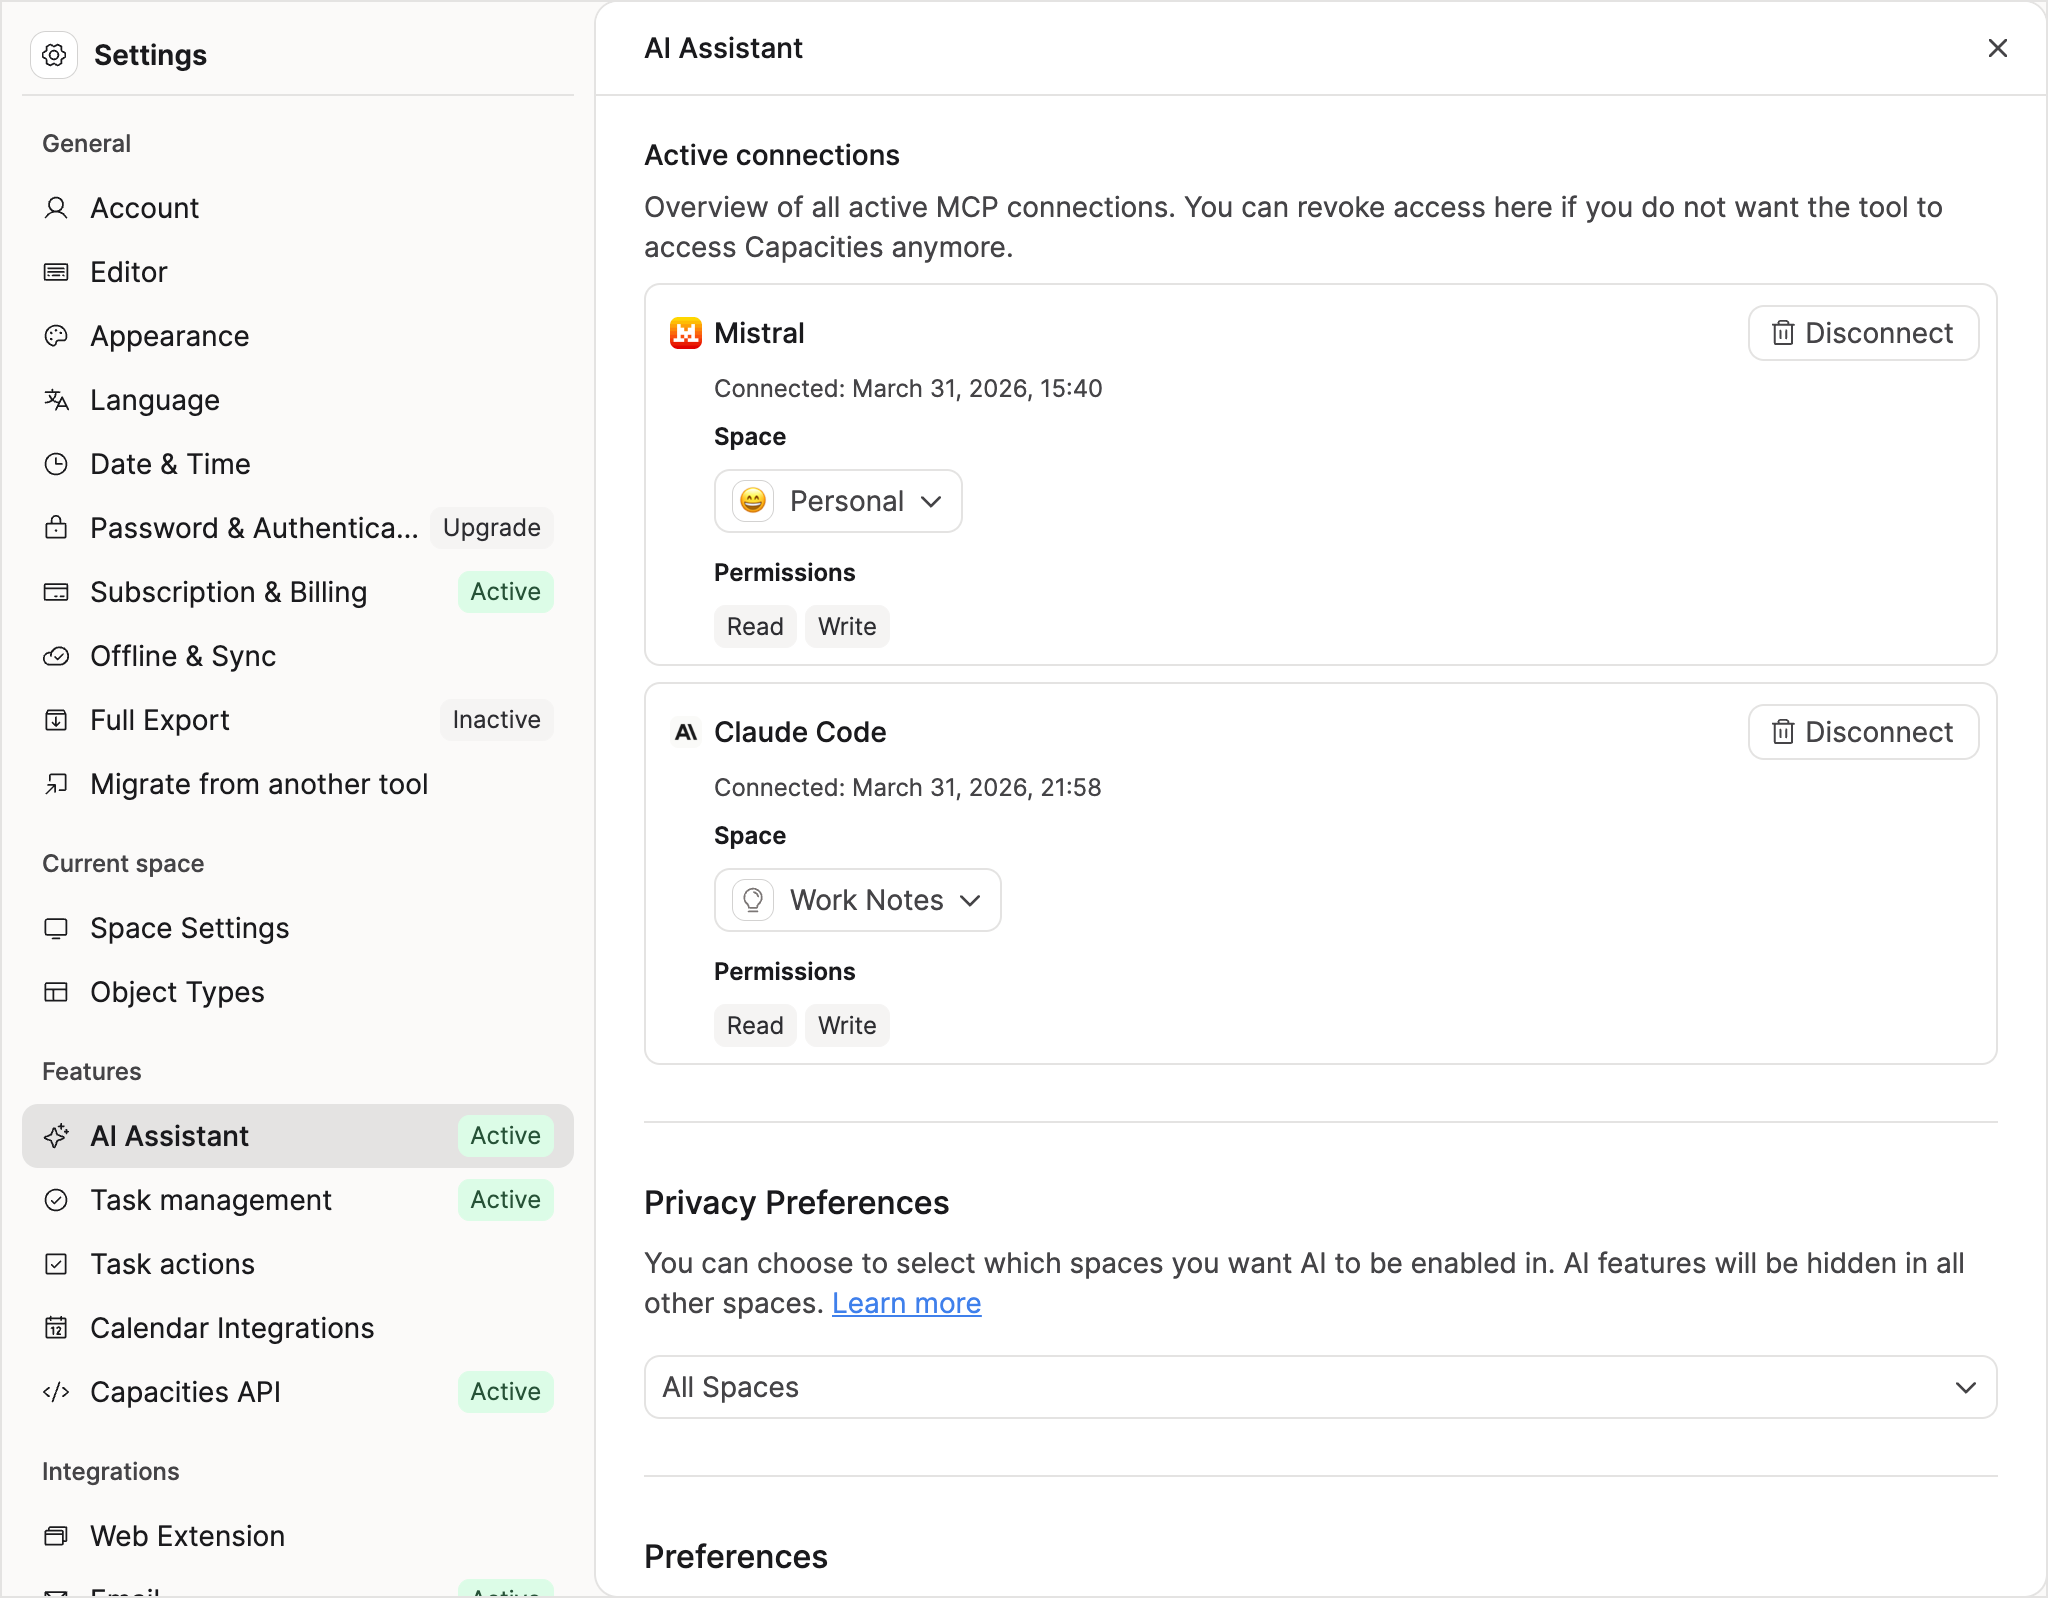
After completing the authentication process for any AI tool, a new entry will appear in Settings > AI Assistant > AI Chat Connectors - Active Connections.
If you'd like to remove access for that tool, simply click on Disconnect on its entry. Note that this doesn't automatically remove it from the tool's connections. Likewise, removing the Connector from your AI tool won't automatically remove its access rights from Capacities.
Privacy
- Access is limited to your selected space: A connected AI tool can only access data from the space you selected during authentication.
- Privacy policy of the connected AI tool applies: When utilizing external AI tools with Capacities, your settings for the connected AI tool will determine what privacy policy applies on the data that's obtained by the AI model by using the Capacities connection. If you're concerned about that tool using your data to train new models or sharing it with third parties, make sure to read that AI tool's privacy policy and configure the tool according to your preferences.
- Permissions configuration: The connection requests read and write access to your Capacities space. Many AI applications let you restrict what the assistant can do with that access.
- Write access can create and change content: With write permission, a connected assistant can save to your daily note, create pages and tasks, update properties on existing objects, append content to existing notes, add, update, or delete blocks in an object, create custom objects with the properties you specify, and upload media files into your space. Creating new objects is subject to a per-user quota; see Creation limits in our developer documentation.
Please check our AI Privacy page for details on our privacy with AI features.
FAQs
- Why does my AI Chat Connector show an error?
AI Chat Connectors only work for spaces where AI Assistant is enabled. If you limit AI to selected spaces under Privacy Preferences inSettings > AI Assistant, the connected space must be on that list. Otherwise the space may be missing from the consent screen, tool calls in your AI app may fail, or an active connection may show Space unavailable.
To fix it, openSettings > AI Assistant, activate AI if needed, and add the space under Privacy Preferences. Then run the authentication flow again or retry the prompt in your AI tool. - Why is my space missing on the AI Chat Connector consent screen?
If a space does not appear in the consent list during authentication, AI Assistant is not enabled for that space. Only spaces with AI Assistant enabled are shown and can be connected through MCP. - Can I connect one AI tool to multiple spaces?
Yes, but each connection is scoped to one space. To use multiple spaces in the same AI tool, create separate MCP connections and authorize each space individually.
- If I disconnect in Capacities, is it also removed inside ChatGPT, Claude, or Cursor?
No. Disconnecting in Capacities removes access rights on the Capacities side, but it does not automatically delete the connector entry in the AI tool. You may want to remove it there as well.
Future updates
You should expect more functionality to be delivered for Chat Connectors. You can read about our Roadmap on our MCP Server documentation.
If you’re implementing a custom MCP client (OAuth 2.1, PKCE, token refresh) to integrate Capacities into your own app/agent/bot, please refer to Model Context Protocol (MCP) instead.
Ask a question! - The Docs Assistant knows everything about the documentation, and the ideas and feature requests from other users.
Create a ticket on our feedback board. - Let us know if you have an idea for a feature, improvement or think there is something missing.
Request additions to the documentation. - If your questions are not getting answered, let us know and we will extend the documentation.